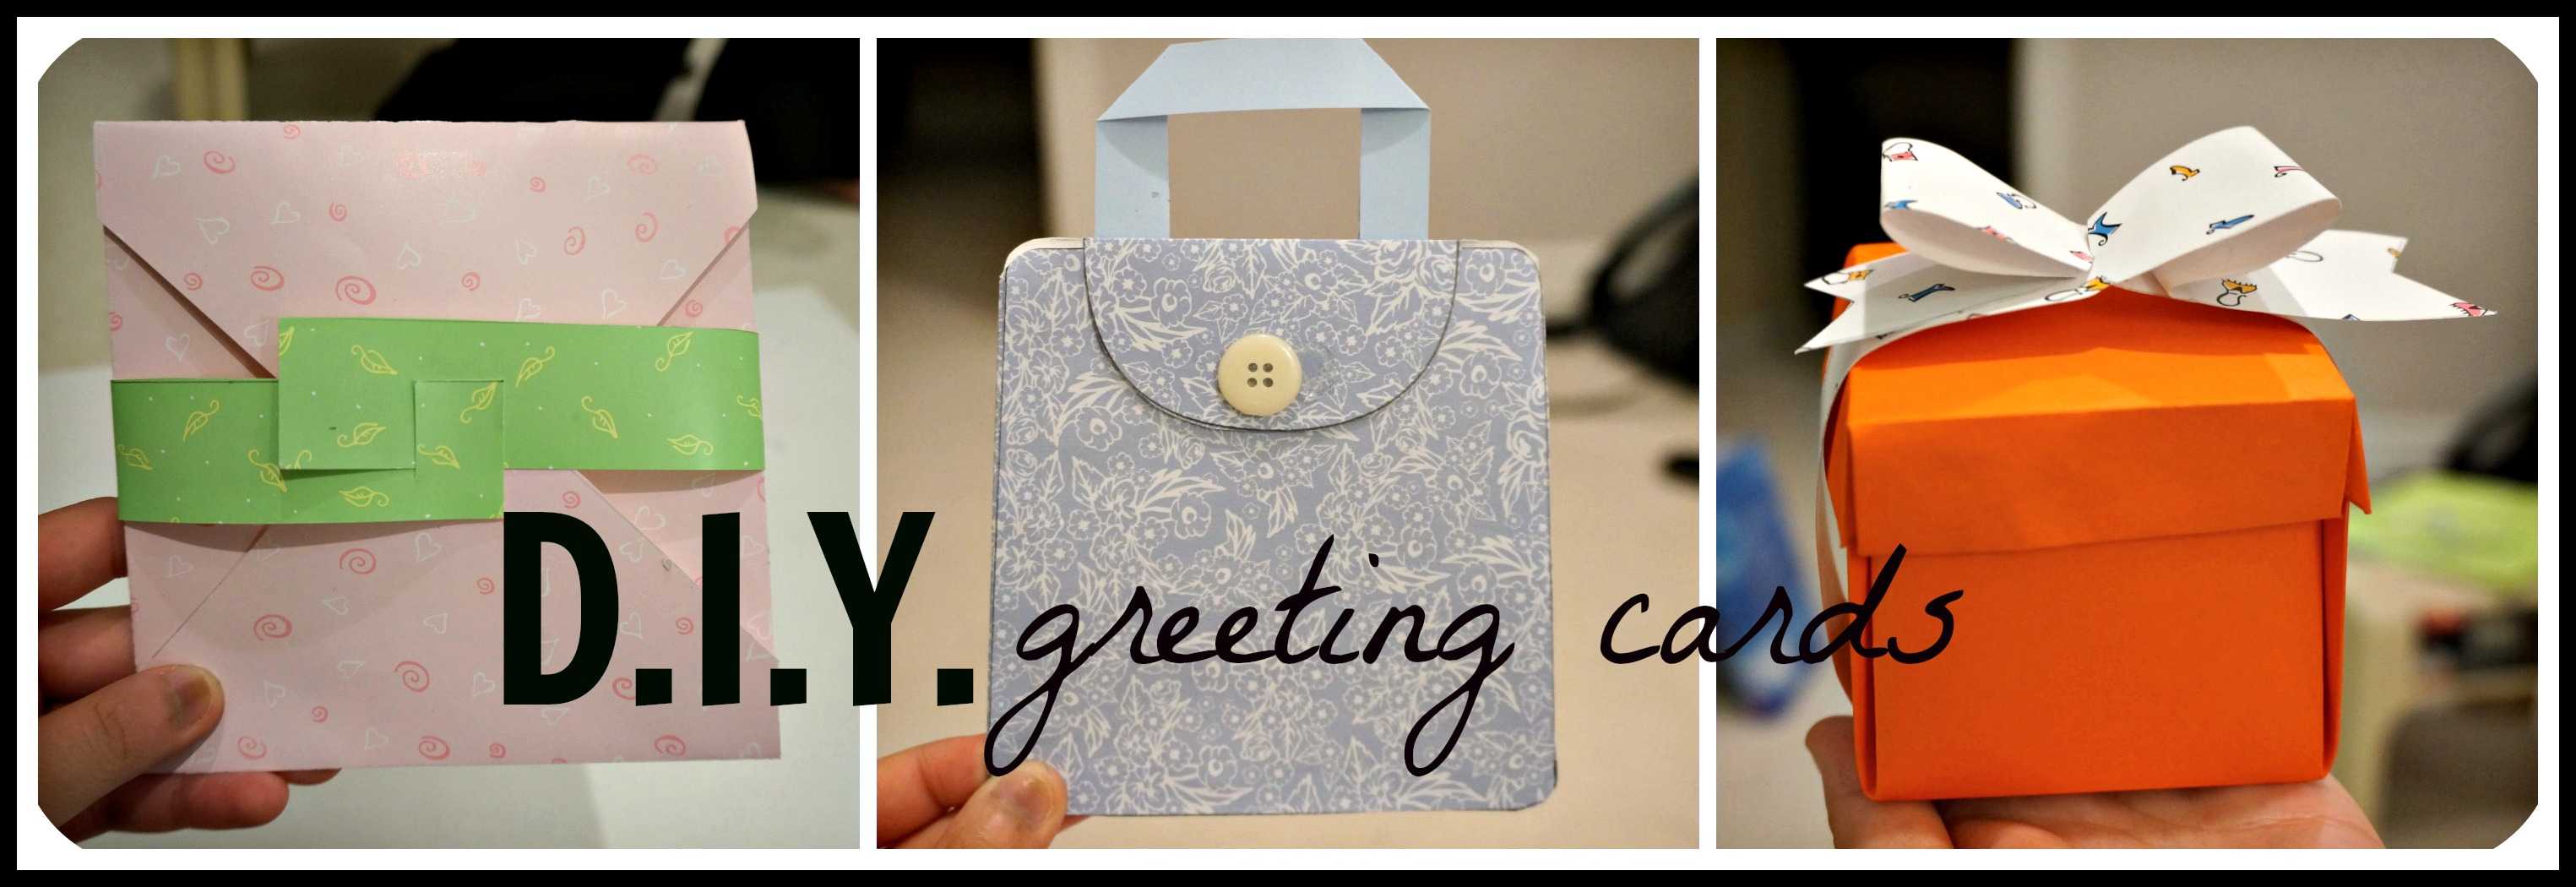
D.I.Y. Greeting Cards
March 25, 2014
The next time you give someone a present, ditch the Hallmark card and try out one of these simple handmade cards instead. From the classic Simple Square to the adorable Itty Bitty Box, these crafty ideas will add the perfect finishing touch to your gift. Be sure to check out the Try This Instead feature as a source of alternative design ideas for each card.
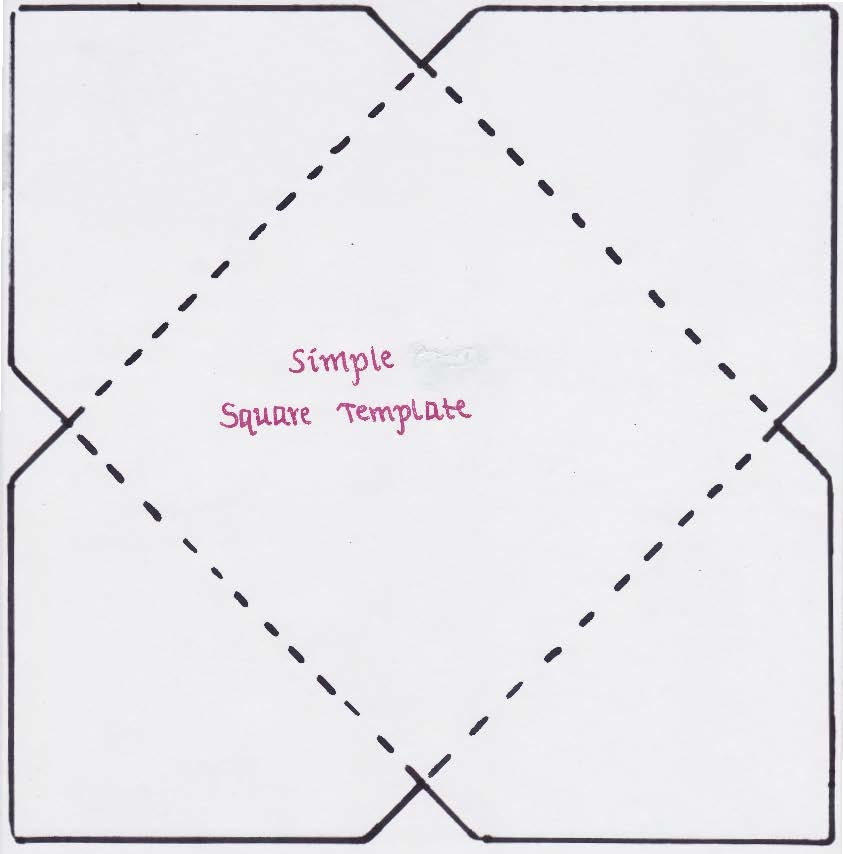
The Simple Square:
Both minimal and timeless, the elegant Simple Square is easy to make and folds up into its own envelope secured with a paper band.
Materials
- 1 sheet of cardstock
- Square Template
- Pencil
- Scissors
- Paper clip
- 1 piece of text paper
- Ruler
How-To
The Card:
- Trace the Simple Square Template onto a sheet of cardstock and cut it out.
- Using the top loop of a paper clip, score the fold lines on the sheet according to the guidelines on the template.
- Fold in the side flaps and crease well.
- Fold in the top and bottom flaps and crease well.
- Decorate the card as you wish.
The Paper Band:
- Cut a strip of text paper one inch wide and 12 inches long.
- Wrap the band around the card so that the ends overlap in the center. Position the band so that the bottom layer peeks out from underneath the top layer.
- Draw a vertical line on the top layer one inch from the right edge, starting from the top of the band and ending in the middle. Repeat the same process on the bottom layer, this time drawing a line one inch from the left edge.
- Cut along the two vertical lines.
- Connect the ends of the layers to form an interlocking band that encompasses the card.
Try This Instead:
- Tie a bow around the card
- Seal the card with a sticker
Template:
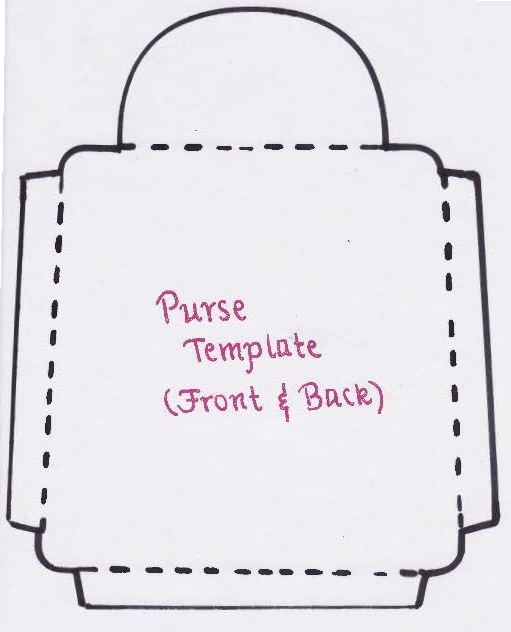
The Purse:
This charming purse card is the perfect accessory to a beautifully wrapped gift.
Materials
- 2 sheets of cardstock
- 1 sheet of cardstock or text paper for the card inside
- Pencil
- Scissors
- Ruler
- Paper clip
- Glue
- Purse template
How-To
The Purse:
- Trace the front of the purse onto a sheet of cardstock by laying the purse template onto a sheet, drawing around the four rounded corners of the template, and then connecting the lines using a ruler. Cut it out.
- Trace the back of the purse onto the same sheet of cardstock by simply tracing around the edges of the template. Cut it out
- Using the top loop of a paper clip, score the fold lines onto the back of the purse according to the guidelines on the template.
- Fold the side and bottom flaps in. Crease well, and remain folded.
- Fold down the top flap. Crease well, then unfold.
- Apply glue along the side and bottom folded flaps, then lay the front of the purse over the sticky flaps.
- Fold down the top flap of the purse and lay the card underneath a heavy book to dry.
- Create a card to slip inside the purse by cutting a sheet of cardstock or text paper measuring 9 inches by 6 inches and folding it in half.
The Handle:
- Cut a strip of cardstock measuring ½ inch wide and 6 inches long.
- Measure in 2 ¼ inches from each side and mark a dot with a pencil.
- Fold both ends at the dots so that they point straight downwards.
- Apply glue to the bottom ends of the handle and stick it to the back of the purse.
Try This Instead:
- Glue a flap of contrasting paper over the original flap of the purse
- Create a purse out of a recycled paper bag
- Use scalloped scissors to create an attractive top edge
- Glue a button onto the flap
Template:
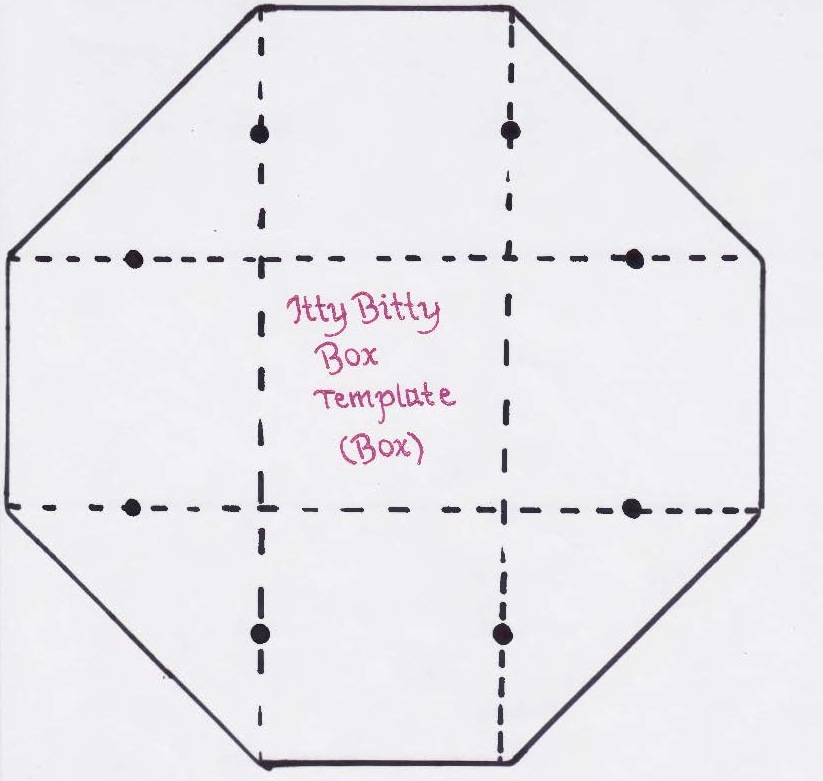
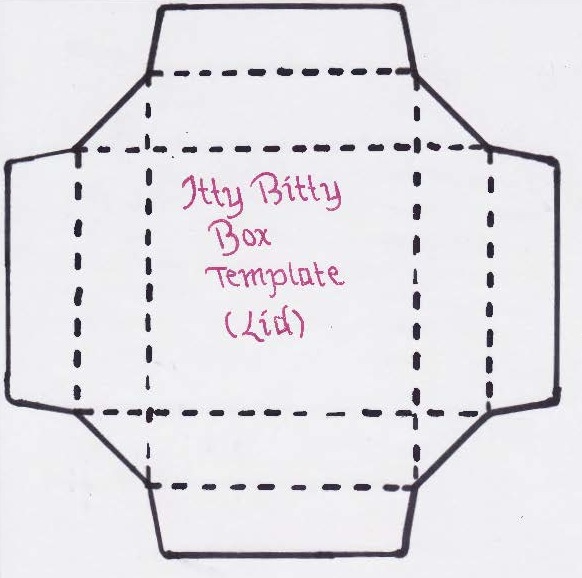
The Itty Bitty Box:
This darling card folds up into a compact box sealed with a bow or paper band.
Materials
- 2 sheets of cardstock
- 1 sheet of text paper
- Pencil
- Scissors
- Paper clip
- Glue (liquid glue is recommended)
- Box templates (box, lid, and bow)
How-To
The Box:
- Trace the box template onto a sheet of cardstock and cut it out.
- Using the top loop of a paper clip, score the fold lines on the sheet according to the guidelines on the template.
- Mark the dots indicated on the template on the paper. Make sure the fold lines run through the dots.
- Crease each fold line well and then unfold.
- With the outside of the sheet facing down, stand the top and left sides of the sheet up, gently pushing the in-between triangular piece inwards toward the center as you do.
- Hold the two sides together and crease the triangle down to the bottom corner.
- Repeat steps 4 and 5 all the way around the box. Set the box aside to work on the lid.
- Trace the lid template onto a sheet of cardstock and cut it out.
- Using the top loop of a paper clip, score all fold lines on the sheet according to the guidelines on the template.
- Lay the lid in front of you with the outside facing down. Fold each flap at the scored fold lines, crease well, then unfold.
- Similar to the assembly of the box, stand the top and left sides of the lid up, gently pushing the in-between triangular piece toward the center. Pinch the triangle to flatten it.
- Repeat step 10 all the way around the lid.
- Spread glue onto the top flap of the lid as well as on the tiny triangular pieces at the ends of it.
- Lift the top and side flaps, making sure to push the little triangles in toward the center.
- Fold the sticky flap down, ensuring that it covers the triangular pieces. Pinch the flap until the glue dries, or use a paper clip to hold it in place.
- Repeat steps 12 through 14 to assemble the other three flaps.
- Decorate the inside of the box as you wish.
- Assemble the box by folding the four flaps up, then placing the lid on top to hold the box closed.
The Bow:
- Trace the bow template twice onto a sheet of text paper and cut the two pieces out. Make sure the short ends are on top and the two notched sides face each other.
- Slide the two pieces together to create a bow. It may be necessary to cut the notch deeper to ensure the edges of the pieces align.
- Pinch the center of the bow against the top of the box to hold it in place, then wrap the ends around the box.
- Apply glue onto one of the ends and press the other end on top to secure the bow in place. Hold in place until the glue is dry.
Try This Instead:
- Tie the box with a ribbon
- Encompass the box with a paper band (follow the instructions included in the Simple Square card listed above)
Templates: